Our house has gotten fuller since tiny chumley came into our lives, not only because our lives are more enriched, but because, well, we just have more stuff. So it hardly made any sense for me to buy the chair i spied at the habitat restore a few weeks ago, but there it was, sitting in sadness outside along with all its other buy one get one free wooden misfit counterparts. Just begging to be saved.

Naw, we don’t need it, I thought as I started looking to see how easily it might be recovered. Screws on the seat underside - yeppies, but the back, hmm, oh, screws, and a weird but surely manageable tab in slot system! Metal chairs like this were always kind of cool so, eh, even though I can’t find another chair to bogo, I guess I would only be out four bucks so... sold!
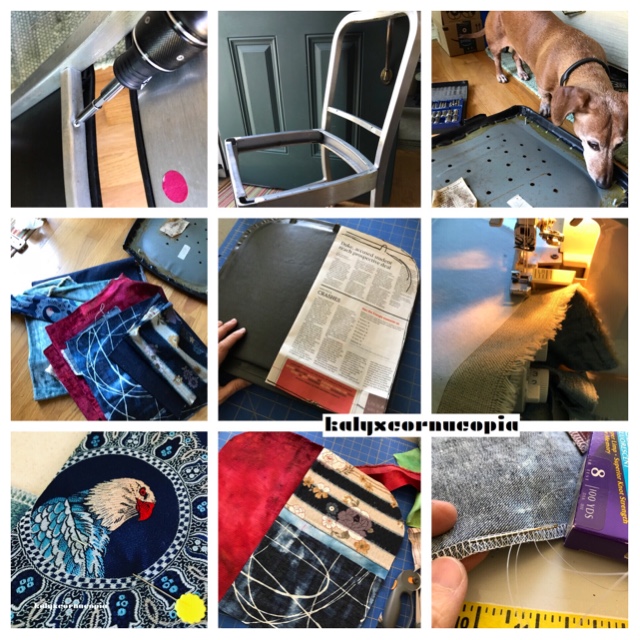
The tricky part of doing an office chair of any sort is that fabric usually cannot be affixed using a staple gun. This basically turns the project into a sewing project, using traced patterns, upholstery thread and a curved upholstery needle. In tracing patterns, be very generous with seam allowances and where possible always serge (or zigzag atitch) the edge of each piece to keep things tidy and to provide the all important channel for threading fishing line where needed, because..

...once threaded all around, (or in this case 3/4 around) pull the fishing line taut on the fabric for the front of the seatback to create a sort of shower cap effect . This helps the fabric conform to the curves of the piece, while the large seam allowance I mentioned earlier helps minimize the wrinkles at the visible outer edge. Once the front fabric is smoothed and secured using pins, sew the back fabric in place using the curved needle and upholstery thread.

The seat bottom for this was a bit more of a challenge than I anticipated because I couldn’t easily pry open the little tabs that were holding the vinyl hostage. Plan B was to create a surface on the underside onto which I could sew the cover fabric. So just as I did with the back of the seat back, I traced a pattern and used it on fabric that had been interfaced to improve body and durability. For the seat bottom underside fabric, I also added a dart and some breather holes. After filling in some missing foam and taping all the vinyl cracks and otger susceptible areas to hopefully minimize future splits, I covered the seat bottom with a bit of batting temporarily held in place with sulky spray, then covered that with a dark indigo denim that folded over to the underside. Then and only then was it time to hand sew the denim to the piece I had made and put darts in, being careful to use clamps to maintain proper slack and tension in the denim so that the seat bottom could go back on the chair the way it was intended, with a lip over the edge.

Put everything back together and then voila!

super cool new chair for the foyer!

or, as tiny chumley would like to remind me, super cool new chair for a wolf in the foyer, dontchoo mean, mom? :)


4 comments:
You always do such an incredible job! I was wondering what the holes on the underside were for, I never would have thought to make airholes but attention to the details is everything. I'm glad Baxter looks out for things like that!
Love!
Baxter, your mom is so amazing with her crafty skills. Of course the chair looks better in the foyer with a little wolf on it! :)
I remember those office chairs....guess I'm showing my age. What a transformation...so very pretty!
Little Wisconsin Klaus' mom, Krista
Post a Comment